Adjust Raspberry Pi Camera Focus
Learn how to perform a focal lens adjustment on the Raspberry Pi camera.
If you experience poor QR scanning performance with the SeedSigner (or SeedHammer) controller then it is most likely due to the Raspberry Pi camera lens being adjusted to a wrong focal length from the factory. However, this can be easy adjusted with the right technique and tools.
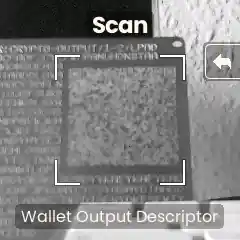 Before adjustment.
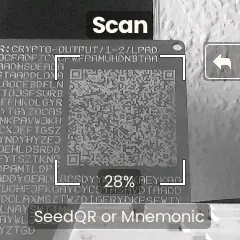 After adjustment.
Adjusting The Camera Focus
The Raspberry Pi camera is equipped with a lens capable of rotation for focus adjustments. Although it is marketed as a fixed-focus camera, it comes with three adhesive fix points to secure the lens in a particular position. In the image below, you can observe the glue placement, denoted by letters A, B, and C:
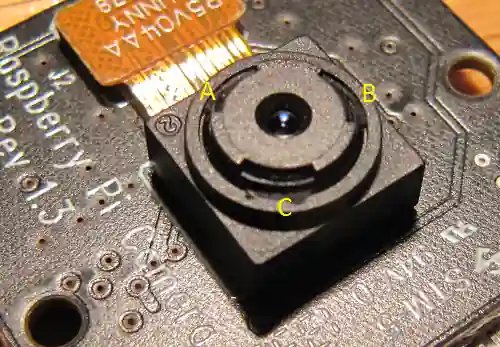 Source: Raspberry Pi Foundation.
In order to enable lens rotation for focus adjustments, carefully remove these adhesive blobs by hand using a sharp tool such as a needle, scalpel, or dental pick. Ensure that you completely disconnect the camera from the Raspberry Pi before proceeding with these adjustments.
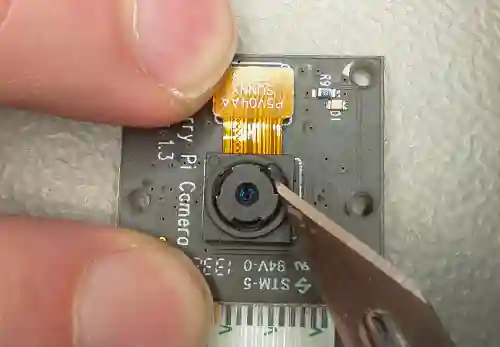 Source: Raspberry Pi Foundation.
After successfully cleared away all traces of the adhesive, use a pair of tweezers or jewelry pliers to grasp the inner section of the camera, as illustrated below. It should turn without resistance. Gently rotate it counterclockwise a few times.
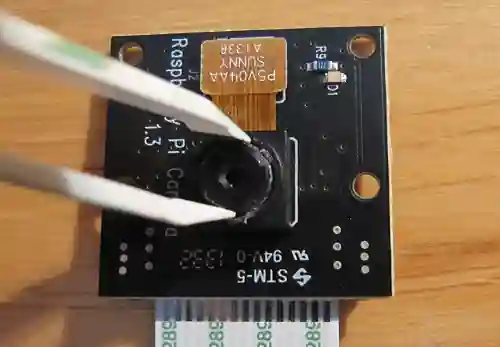 Source: Raspberry Pi Foundation.
Subsequently, reconnect the camera to the Raspberry Pi and check the scanning performance. Repeat turning the lens until near field QR scanning seems in focus and works as expected.
Exercise caution to avoid over-rotating the lens, as excessive rotation may cause it to disengage, making it somewhat challenging to reposition it on the thread. Should this occur, gently place it back in position and rotate it clockwise until it securely engages.
Once you've attained the desired focus, there's no need for reapplication of adhesive. The lens will remain fixed in place and won't inadvertently shift, even in the event of minor impacts or jolts.